B/S(WEB)系统中使用Activex插件调用扫描仪实现连续扫描并上传图像(IE文件扫描并自动上传
问题:
IE浏览器下使用Activex插件调用客户端扫描仪扫描文件并山传,可以将纸质档案(如合同、文件、资料等)扫描并将扫描图像保存到服务器,可以用于合同管理、档案管理等。
通过插件方式调用扫描仪扫描并获取图像,可以减少用户操作,减少操作出错,如一次扫描量大也可以使用连续扫描,由系统对扫描文件进行编号或进行其他处理。
web页面中只需通过js调用后启动扫描仪扫描,即可获取扫描文件的图像编码,再通过ajax或表单提交到服务器解码后保存为jpg文件即可。
通过服务器上程序处理后,可以方便以后浏览或去其它用户共享!
web调用扫描仪插件activex扫描图像上传并预览

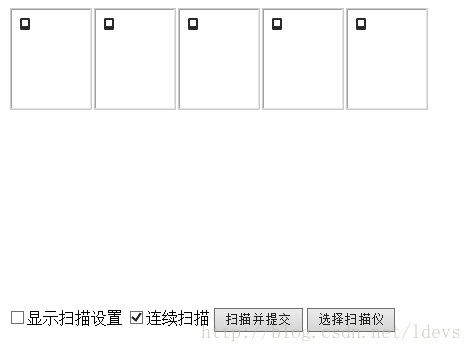
页面HTML代码
<divid=“scanFileList”style=“height:300px; overflow:auto;”>
</div>
<div>
<inputtype=“checkbox”id=“cbo_set”/><labelfor=“cbo_set”>显示扫描设置</label>
<inputtype=“checkbox”id=“cbo_lxsm”/><labelfor=“cbo_lxsm”>连续扫描</label>
<inputtype=“button”value=“扫描并提交”οnclick=“scanClick();”/><inputtype=“button”οnclick=“selscan();”value=“选择扫描仪”/>
</div>
改进后
<!DOCTYPEhtml>
<htmlxmlns=”http://www.w3.org/1999/xhtml”>
<head>
<metahttp-equiv=”Content-Type”content=”text/html; charset=utf-8″/>
<title>Web图片上传控件演示页面</title>
<scripttype=”text/javascript”src=”js/jquery-1.3.2.min.js”></script>
<scripttype=”text/javascript”src=”js/json2.min.js”charset=”utf-8″></script>
<scripttype=”text/javascript”src=”js/img2.js”charset=”utf-8″></script>
</head>
<body>
<p>演示取cookie和session,并传给控件,可支持firefox(45-),chrome(45-)</p>
<divid=”img-uper”></div>
<divid=”msg”></div>
<scripttype=”text/javascript”>
var imgUp = new ImageUploader();
imgUp.Config[“PostUrl”] = “http://localhost:8889/asp.net/upload.aspx”;
imgUp.Config[“Cookie”] = ‘ASP.NET_SessionId=<%=Session.SessionID%>‘;
imgUp.Config.Fields[“UserID”] = “123456”;
imgUp.LoadTo(“img-uper”);
imgUp.ent.loadCmp = function () {
setTimeout(function () {
//imgUp.addFolder(“F:\\ftp”);
}, 1000);
};
$(function () {
$(“#btnAddLoc”).click(function () {
imgUp.addFile($(“#tb-path”).val());
});
});
</script>
</body>
</html>
服务器端(fileup.aspx)接收文件代码(用户可以根据需要转换为java、php等不同语言以适应现有的系统环境)
string imgBase64 = Request.Params[“img”];
if(imgBase64 !=null&& imgBase64 !=“”)
{
byte[] imgbytes = Convert.FromBase64String(imgBase64);
string imgpath =“temp/”+ System.Guid.NewGuid()+“.jpg”;
System.IO.FileStream fs =new System.IO.FileStream(Server.MapPath(imgpath), System.IO.FileMode.OpenOrCreate);
fs.Write(imgbytes, 0, imgbytes.Length);
fs.Close();
Response.Write(“{id:”+ Request.Params[“id”]+“,src:'”+ imgpath +“‘}”);
}
改进后:不需要转换成BASE64,不需要通过AJAX上传,不存在跨域问题,
using System;
using System.Web;
using System.IO;
namespace WebApplication1
{
publicpartialclassupload : System.Web.UI.Page
{
protectedvoid Page_Load(object sender, EventArgs e)
{
if (Request.Files.Count > 0)
{
string folder = Server.MapPath(“/upload”);
//自动创建上传文件夹
if (!Directory.Exists(folder))
{
Directory.CreateDirectory(folder);
}
HttpPostedFile file = Request.Files.Get(0);
//utf-8编码时需要进行urldecode
string fn = HttpUtility.UrlDecode(file.FileName);//guid,crc,md5,ori
System.Diagnostics.Debug.WriteLine(fn);
string ext = Path.GetExtension(fn).ToLower();
if (ext == “.jpg”
|| ext == “.gif”
|| ext == “.png”
|| ext == “.bmp”
|| ext == “.tif”)
{
string filePath = Path.Combine(folder, fn);
file.SaveAs(filePath);
//返回json格式
string res = “{\”id\”:\””+id+“\”,\”success\”:1,\”url\”:\”/upload/”+fn+“\”}”;
Response.Write(res);
}
}
}
}
}
解决方案:
采用泽优Web图片上传控件(img2)自动上传本地图片。
过程:
在扫描仪扫描后会提供一个事件,在这个事件中可以获取扫描仪扫描的图片路径,将这个路径添加到泽优Web图片上传控件(img2)中,img2就能够自动上传此图片。img2上传成功后会提供一个事件(post_complete),在此事件中可以得到图片上传后的地址。
详细介绍:http://blog.ncmem.com/wordpress/2019/09/05/泽优web图片上传控件img2产品介绍/